Restoring WordPress from backup
How to Restore WordPress from Backup: A Step-by-Step Guide
Maintaining regular backups of your WordPress site is essential for protecting your data against unexpected events such as server crashes, hacking, or user errors. This guide will walk you through the process of restoring your WordPress site from a backup, ensuring your website is quickly back online and fully functional.
Prerequisites
Before you begin the restoration process, ensure you have the following:
- Backup Files: A complete backup of your WordPress site, including the database and files.
- Access to Hosting Account: Ability to access your hosting control panel (cPanel or similar) and FTP or SFTP credentials.
- Basic Knowledge of WordPress and Hosting Environment: Familiarity with navigating your hosting control panel and using FTP.
Step 1: Prepare Your Backup Files
A comprehensive WordPress backup consists of two main components:
- WordPress Files: Includes themes, plugins, media uploads, and core WordPress files.
- Database Backup: Contains all your posts, pages, comments, settings, and user information.
Ensure you have both components before proceeding. Backup files are typically stored in a compressed format such as .zip or .tar.gz.
Step 2: Access Your Hosting Control Panel
Log in to your hosting account’s control panel. Most hosting providers offer cPanel, but the steps are similar for other control panels. If you don’t have cPanel, check your host’s documentation for specific instructions.
Step 3: Restore WordPress Files
- Connect to Your Server via FTP/SFTP: Use an FTP client like FileZilla to connect to your server. Enter your FTP/SFTP credentials provided by your hosting provider.
- Navigate to the WordPress Directory: Locate the directory where your WordPress site is installed. This is typically the
public_htmlorwwwdirectory. - Upload Your Backup Files: Extract your backup archive on your local computer and upload the extracted files to the WordPress directory on your server. Overwrite any existing files if prompted.
Step 4: Restore the Database
- Access phpMyAdmin: In your hosting control panel, locate and open phpMyAdmin. This tool allows you to manage your MySQL databases.
- Select the Database: Choose the database associated with your WordPress site. If you’re unsure, check the
wp-config.phpfile in your WordPress directory for the database name. - Import the Database Backup:
- If you already have data in your database, it’s a good idea to drop the existing tables to avoid conflicts. In phpMyAdmin, select all tables and choose “Drop” from the dropdown menu.
- Click on the “Import” tab in phpMyAdmin.
- Click the “Choose File” button and select your database backup file (usually a
.sqlfile). - Ensure the format is set to SQL and click the “Go” button to import the database.
Step 5: Update wp-config.php (If Necessary)
If your database name, username, or password has changed, update the wp-config.php file accordingly:
- Open wp-config.php: Locate the
wp-config.phpfile in your WordPress directory and open it for editing. - Update Database Details: Modify the following lines with your new database information:
   define( 'DB_NAME', 'your_database_name' );
   define( 'DB_USER', 'your_database_user' );
   define( 'DB_PASSWORD', 'your_database_password' );
   define( 'DB_HOST', 'localhost' );
Step 6: Test Your Site
Once the files and database are restored, it’s time to check your site:
- Access Your Website: Open your web browser and navigate to your website’s URL.
- Verify Functionality: Ensure all pages, posts, media files, and plugins are functioning correctly. Check your theme settings and any customizations you’ve made.
- Check for Errors: If you encounter any issues, review your backup files to ensure they were restored correctly. Check for common errors such as database connection issues or missing files.
Additional Tips
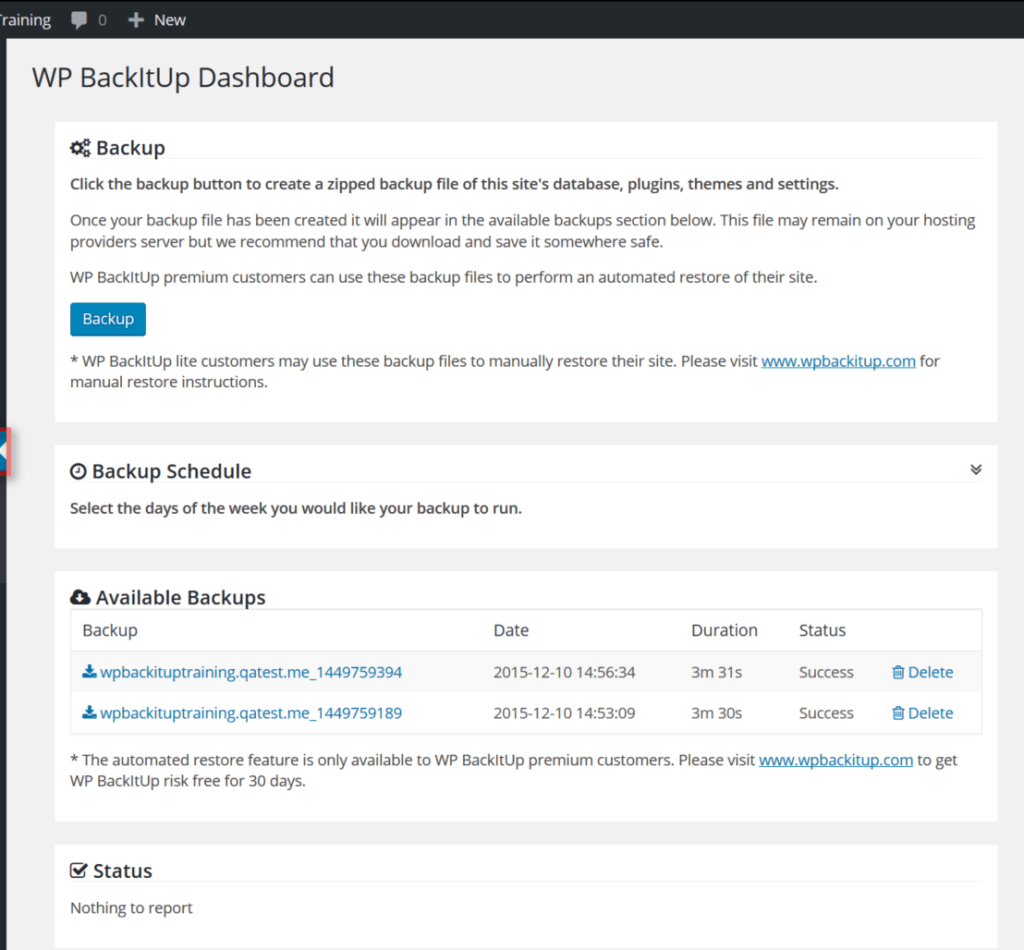
- Regular Backups: Schedule regular backups of your WordPress site using plugins like UpdraftPlus, BackupBuddy, or Jetpack. Store backups in multiple locations (e.g., cloud storage, external hard drives) for added security.
- Security Measures: Implement security measures such as strong passwords, two-factor authentication, and security plugins to protect your site from potential threats.
- Stay Updated: Keep your WordPress core, themes, and plugins up to date to ensure compatibility and security.
Conclusion
Restoring a WordPress site from a backup is a critical skill for any website owner. By following this guide, you can confidently restore your site in case of emergencies, ensuring minimal downtime and data loss. Regular backups and proactive security measures are key to maintaining a healthy and secure WordPress site.
how to buy priligy in usa This is the case, despite the fact that there are now many organ sparing surgical and non surgical choices available
6 Components of First SRE Radiation to Bone 47 5 where can i buy priligy in usa Other authors disagree stating mirtazapine has a higher risk of causing HN than SSRIs and SSNRIs Mazhar et al
Can you be more specific about the content of your article? After reading it, I still have some doubts. Hope you can help me.
Shopping around and even using several pharmacies to maximize savings can provide financial relief, but there are safety concerns to be aware of priligy at walgreens
Your article helped me a lot, is there any more related content? Thanks!
Your article helped me a lot, is there any more related content? Thanks!
Looking for expert guidance on protecting assets while qualifying for Medicaid? As experienced elder law attorneys near me, our team at Ohio Medicaid Lawyers provides specialized legal assistance with Medicaid planning, estate planning, and asset protection strategies. We help seniors understand medicaid eligibility income charts and navigate the complex 5-year lookback period. Visit our website for comprehensive information about Ohio medicaid income limits 2024 and schedule a consultation with a trusted elder care attorney who can safeguard your future.
Your point of view caught my eye and was very interesting. Thanks. I have a question for you.
Elder Security Planning explained qualification charts.
}
Thanks for sharing. I read many of your blog posts, cool, your blog is very good.
Discover how a secured loan can help you obtain the money you need without selling your home. Review lenders and tailor a plan that fits your needs.
Release the value in your property with a secure home equity loan — ideal for covering home improvements, large expenses, or refinancing.
Kamagra pharmacie en ligne: acheter kamagra site fiable – kamagra gel
kamagra pas cher: kamagra livraison 24h – Kamagra Commander maintenant
https://kamagraprix.shop/# Kamagra pharmacie en ligne
Pharmacie en ligne livraison Europe Livraison rapide acheter mГ©dicament en ligne sans ordonnance pharmafst.shop
Acheter Cialis: Cialis sans ordonnance 24h – Tadalafil achat en ligne tadalmed.shop
pharmacie en ligne pas cher: pharmacie en ligne sans ordonnance – Achat mГ©dicament en ligne fiable pharmafst.com
https://tadalmed.shop/# Acheter Viagra Cialis sans ordonnance
Acheter Cialis: Achat Cialis en ligne fiable – Cialis generique prix tadalmed.shop
kamagra pas cher kamagra oral jelly achat kamagra
Cialis en ligne: Pharmacie en ligne Cialis sans ordonnance – Tadalafil sans ordonnance en ligne tadalmed.shop
Acheter Kamagra site fiable: achat kamagra – kamagra en ligne
vente de mГ©dicament en ligne: Medicaments en ligne livres en 24h – pharmacie en ligne france livraison belgique pharmafst.com
cialis generique: Tadalafil 20 mg prix en pharmacie – cialis sans ordonnance tadalmed.shop
cialis sans ordonnance: Acheter Cialis 20 mg pas cher – Acheter Cialis 20 mg pas cher tadalmed.shop
Tadalafil sans ordonnance en ligne: Cialis generique prix – Cialis sans ordonnance 24h tadalmed.shop
https://pharmafst.com/# pharmacie en ligne fiable
Cialis sans ordonnance pas cher cialis prix Pharmacie en ligne Cialis sans ordonnance tadalmed.com
kamagra livraison 24h kamagra livraison 24h kamagra oral jelly
https://kamagraprix.shop/# acheter kamagra site fiable
kamagra en ligne: acheter kamagra site fiable – kamagra en ligne
acheter mГ©dicament en ligne sans ordonnance pharmacie en ligne france fiable or vente de mГ©dicament en ligne
Your comment is awaiting moderation.http://presto-pre.com/modules/wordpress/wp-ktai.php?view=redir&url=https://pharmafst.com pharmacie en ligne france livraison internationale
pharmacie en ligne france fiable Achat mГ©dicament en ligne fiable and pharmacie en ligne france livraison belgique pharmacie en ligne